
In Step 2, you will use the Pile Group Wizard to create a 2 x 2 pile group and specify the piles’ properties.
Open the Pile Group Wizard by selecting the Wizards tab on Repute’s ribbon and clicking on the Pile Group Wizard button.
When the Wizard appears, choose the Predefined plan arrangement and change the Total number of piles to 4. The picture on the left-hand side of the Wizard will change to show you the default 2 x 2 pile arrangement.
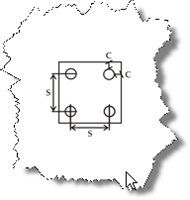
Change the Spacing between the piles to 3m, but leave the Cover at its default value (200mm).
Click Next to display the next page.
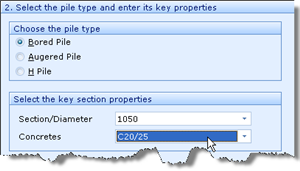
Choose ‘Bored pile’ as the pile type, change the Section/Diameter to 1050mm, and select C20/25 as the Concrete grade to be used. By default, this concrete has Young’s modulus of 30 GPa.
Click Next to display the next page.
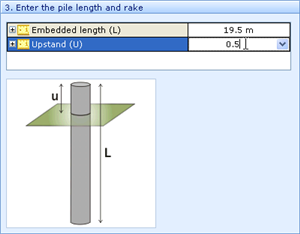
Change the Embedded length (L) to 19.5m and the Upstand (U) to 0.5m.
Click Next to display the next page.
Leave all the values on this page as zero – this will position the pile group centrally in the co-ordinate system (and not rotated) .
Click Next to display the next page.
Tick “Stage 1” to add the pile group to the scenario.
Click Next to display the last page.
If you wish to review any of the settings you have made, click Back to return to the relevant page. Otherwise, click Finish to generate the pile group.
The Pile Group Wizard then:
Creates Piles 1-4
Creates Pile Group 1
Creates Concrete 1
Links Piles 1-4 to Concrete 1
Adds Piles 1-4 to Pile Group 1
Adds Pile Group 1 to Stage 1
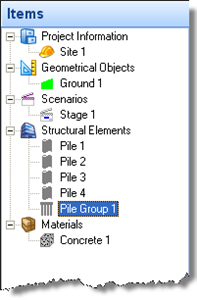
The Project Manager should now look like the screenshot below:
A copy of this step can be found at [Projects]\Tutorial 4\Step 2.rpx.
Step 3 - create the borehole