In Step 3, you will use the Borehole Wizard to create a borehole containing clay and sand layers.
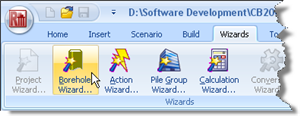
Open the Borehole Wizard by selecting the Wizards tab on Repute’s ribbon and clicking on the Borehole Wizard button.
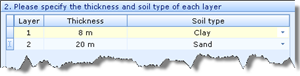
When the Wizard appears, increase the number of layers to 2.
Click Next to display the next page.
Change the thickness of Layer 1 to 8m and its type to “Clay”. Change the thickness of Layer 2 to 20m and its type to “Sand”.
Click Next to display the next page.
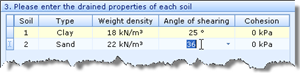
Change the weight density of Soil 1 to 18 kN/m3 but leave its angle of shearing as 25̊. Change the weight density of Soil 2 to 22 kN/m3 and set its angle of shearing to 36̊. Leave the cohesion of both soils unchanged at 0 kPa.
Click Next to display the next page.
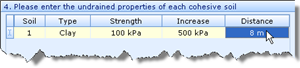
Change the undrained strength of Soil 1 to 100 kPa, its increase in strength to 500 kPa, and the distance over which the increase occurs to 8m.
Click Next to display the next page.
Tick “Stage 1” to add the borehole to the scenario.
Click Next to display the last page.
If you wish to review any of the settings you have made, click Back to return to the relevant page. Otherwise, click Finish to generate the borehole.
The Borehole Wizard then:
Creates Soils 1-2
Creates Layers 1-2
Creates Borehole 1
Links Soil 1 to Layer 1
Links Soil 2 to Layer 2
Adds Layers 1-2 to Borehole 1
Adds Borehole 1 to Stage 1
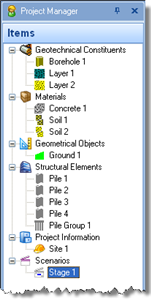
The Project Manager should now look like the screenshot below:
An error message will appear in the Message Board, notifying you that the dry weight of Soil 2 must be less than a certain value. You can ignore this message in this instance.
A copy of this step can be found at [Projects]\Tutorial 4\Step 3.rpx.
Step 4 - enter soils' stiffness properties