In Step 4, you modify the actions on the pile group.
Select “Force 1” in the Project Manager and then, in the Property Inspector, change its Fz value to 50 000 kN, its X-position to 6m, and its Y-position to 3m. When you press Enter, the force’s position will change automatically on the Drawing Board.
Select “Force 2” in the Project Manager and, in the Property Inspector, change its Fx value to 10 000 kN, its Fy value to 7 000 kN, its X-position to 6m, and its Y-position to 3m. As you do this, the force’s orientation and position will change automatically on the Drawing Board.
Select “Moment 1” in the Project Manager and, in the Property Inspector, change its Mx value to 3 000 kNm, its My value to 5 000 kNm, its X-position to 6m, and its Y-position to 3m.
Finally, select “Combination 1” in the Project Manager and, in the Property Inspector, change its X-position to 6m, and its Y-position to 3m. Again, as you do this, the combination’s orientation and position will change automatically on the Drawing Board and the various components of action displayed in the Property Inspector will also change.
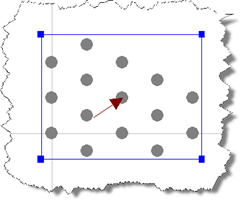
The Drawing Board will now look something like the image below (with the pile group selected):
A copy of this step can be found at [Projects]\Tutorial 6\Step 4.rpx.
Step 5 - perform and review the calculation