In Step 3, you move the piles to their final (asymmetric) positions.
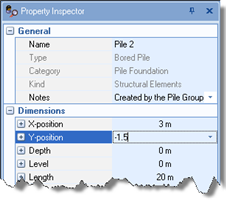
Select “Pile 2” in the Project Manager and then, in the Property Inspector, change its Y-Position to −1.5m and press Enter. The pile’s position on the Drawing Board will change automatically.
Repeat the previous instruction for Pile 4.
Next, change the Y-Position of Piles 7 and 9 to +1.5m.
Change the Y-Position of Piles 12 and 14 to +4.5m.
Finally, change the X-Position of Pile 15 to +3.0m and its Y-Position to +7.5m.
Then, select “Pile Group 1” in the Project Manager and, in the Property Inspector, change its Pile cap breadth in Y-direction to 10.2m and press Enter.
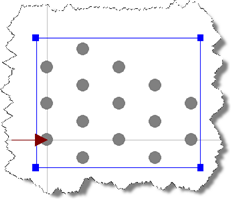
The Drawing Board will now look something like the image below (with the pile group selected):
A copy of this step can be found at [Projects]\Tutorial 6\Step 3.rpx.
Step 4 - modify the loads