In Step 1, you open an existing project and modify its project information.
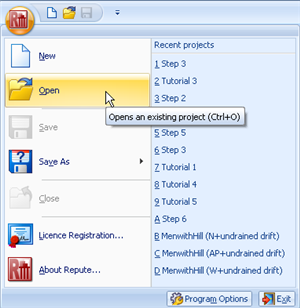
Display the Application menu by clicking on the program’s Application button (located in the top-left hand corner of Repute’s user interface).
Click on the Open command and, in the dialog box that appears, navigate to the folder Projects\Tutorial 6 and select the file Tutorial 4.rpx (this is a copy of the file that was saved at the end of Tutorial 4). Click on the Open button to open this project.
In the Project Manager, double-click on “Site 1” to display its properties in the Property Inspector.
In the Property Inspector, change the Description to “Asymmetric pile group under 3D loading” and the Project ID to “0006”.
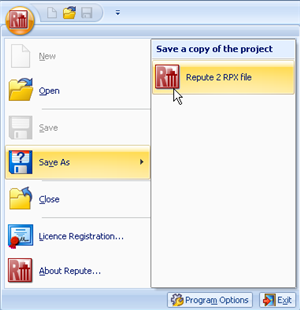
Then save the project under a different name, by displaying the Application menu, clicking on the Save As command, and clicking on the option Repute 2 RPX file.
In the dialog box that appears, change the File name to “Tutorial 6” and click on the Save button to save the modified project with a new name. It will automatically be saved in the folder Projects\Tutorial 6 unless you choose another location for it.
A copy of this step can be found at [Projects]\Tutorial 6\Step 1.rpx.
Step 2 - specify a new pile group