In Step 3, you will add a water table to the scenario.
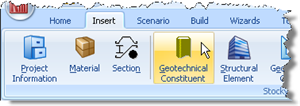
Open the Stockyard’s Geotechnical Constituents panel by selecting the Insert tab on Repute’s ribbon and then clicking on the Geotechnical Constituents button.
The Geotechnical Constituents panel will open in the Stockyard.
Hold the Ctrl key down and click on the item labelled “Ground Water Table”.
The newly-created water table will appear in the Project Manager (under Geotechnical Constituents).
In the Property Inspector, change the Depth (under Dimensions) of Water Table 1 to 1 m.
In the Project Manager, select “Stage 1” (under Scenarios).
In the Property Inspector, place a tick next to Water Table 1 (under Geotechnical Constituents) to add the water table to this scenario. Press Enter to refresh the Drawing Board.
In this step, you have:
Created Water Table 1
Added Water Table 1 to Stage 1
You will find a copy of the project in its current state at [Projects]\Tutorial 3\Step 3.rpx.
Step 4 - create the pile