In Step 3, you will create a bored pile and specify its cross-section and concrete grade.
Open the Concretes group in the Stockyard and create a concrete of grade C35/45.
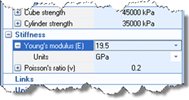
In the Property Inspector, attempt to change the Young’s modulus (E) of the new concrete to 19.5 GPa. First, display the Units control by clicking on the + button to the left of the Young’s modulus (E) label. Change the units from kPa to GPa. Then type 19.5 into the Young’s modulus (E) editor and press Enter.
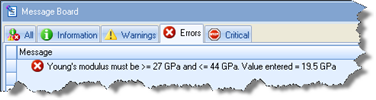
When you press enter, the value will revert back to 34 GPa and the Message Board will open to reveal the error message “Young’s modulus must be >= 27 GPa and <= 44 GPa. Value entered = 19.5 GPa”. You can see this message more easily if you click on the Errors tab at the top of the Message Board.
Since the value of Young’s modulus used by Fleming is outside of the allowable range for Grade Concrete, we will use Custom Concrete instead.
Back in the Concretes panel, create a Custom Concrete. Then set its Young’s modulus to 19.5 GPa as described in item 2 above. (This should succeed.)
Because we no longer need the Grade Concrete, we can delete it from the project by right-clicking on ‘Concrete 1’ in the Project Manager and selecting Edit > Delete. When prompted, confirm that you want to delete ‘Concrete 1’.
Open the Structural Elements group in the Stockyard and create a Bored Pile.
In the Property Inspector, change the Length of the new pile to 12.2m and its Shaft diameter to 775mm (again changing units first). The base diameter will automatically increase to 775mm (displayed as 0.78m). Finally, select “Concrete 2” in the box Material name.
A copy of this step can be found at [Projects]\Tutorial 2\Step 3.rpx.
Step 4 - create the force